
Lite Controller Configuration
Basics - Lite Controller
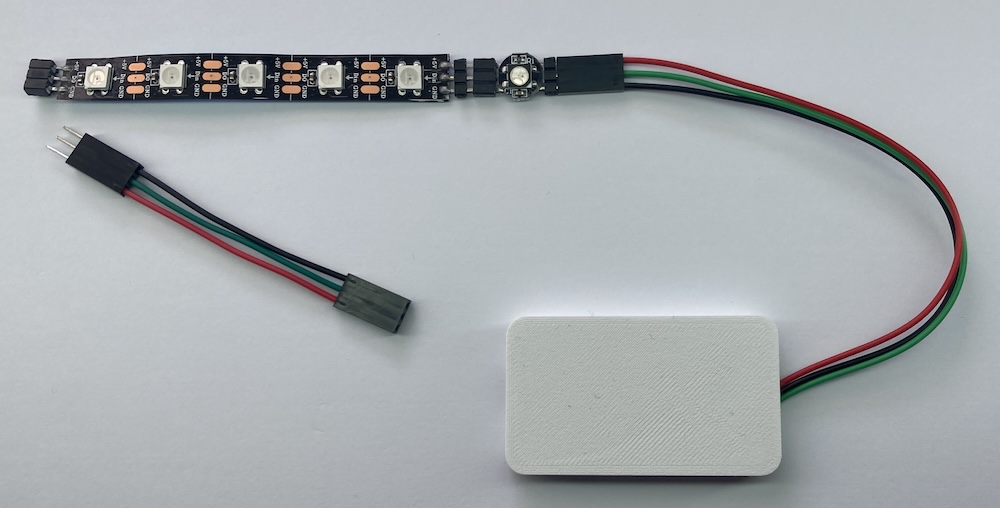
The Controller is the intelligence behind the system. It connects to the first LED in the chain, and issues commands to control up to 30 LEDs, individually if required.
It broadcasts its own WiFi signal, which you connect to with your iOS or Android device in order to configure and control the LEDs
It It is powered by a USB 5V DC connection
Basics - Lite Plus Controller
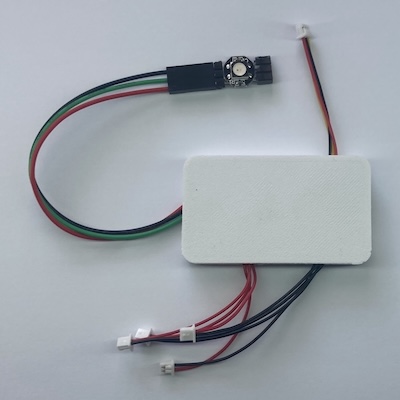
Similar to the Lite controller, with the addition of the following:
Ability to control up to 40 LEDs
4 x physical button / trigger connections for activating effects
1 x audio board connection for enabling sound files to be played using an Adafruit Audio board
Basics - LEDs
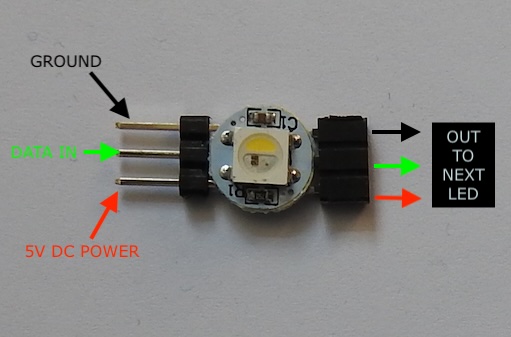
Each LED unit contains a Red, Blue, and Green micro LED, which allows over 16.5 million color combinations. At maximum brightness each LED can theoretically draw 60mA (20mA max for a single color eg red or dedicated white).
The LED chips require 5V DC, and are connected in a daisy chain - with a Data In and Data Out connection.
The LED units are available in single units (requires soldering), single interlocking (no soldering required) or strip versions, depending on your requirements.
You can also connect a lens cover to the LED units in order to run fibre optic cable for small spaces.
The LEDs are 'numbered' according to their position in the connected chain - the 1st LED is LED 1, 2nd is LED 2 etc.
Step 1 - Install App
The configuration and control app runs on iOS or Android. Follow the instructions supplied with your controller to install the app, and download the configuration sofware to it.
Your device will need to be connected to the internet for this step.
Step 2 - Physical Connections
LEDs: The controller comes with a single LED connected at one end. You can connect more LEDs or strips using the interlocking connectors - but take note of the orientation to ensure that 5V goes to 5V, and ground goes to ground etc.
Power: The controller requires 5V DC. Connect a micro USB lead to the controller to provide power. This can be from a mains adapter rated at 5V, or USB battery power pack if required.
Step 3 - Connect to WiFi
When you apply power, a red light on the controller will illuminate, and within a few seconds it will begin broadcasting the 'Inner Light Lite' WiFi SSID. Having already downloaded the control app and downloaded the configuration software to it, connect your device to the 'Inner Light Lite' WiFi according to the instructions provided.
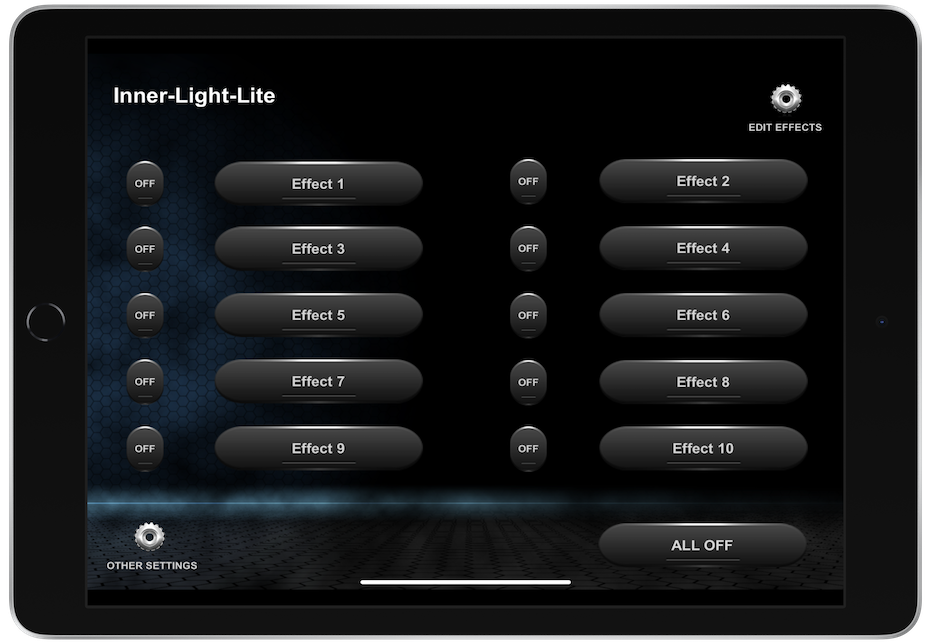
Once your device connects, a blue light on the controller will illuminate. At this point, launch the control app to continue - you should see the following screen:
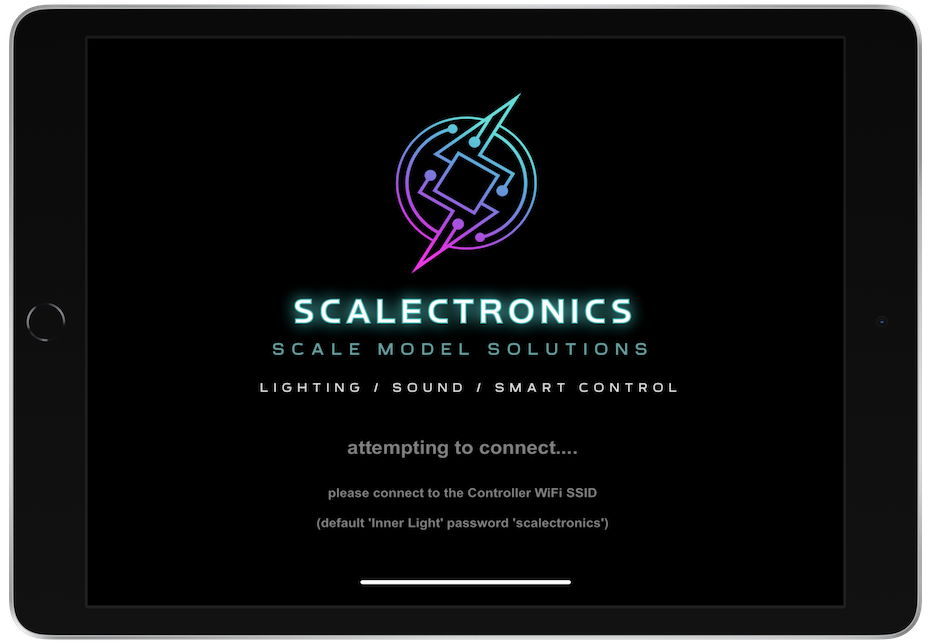
Within a few seconds, the app should automatically change to the following screen, which means the app has successfully connected to the controller:
If the app remains on the welcome screen, ensure that your device is connected to the Inner Light WiFi network and then try again
Step 4 - LED Effects
The main app screen above shows the 10 configurable effects that the controller supports. Each event has a name eg 'Effect 1' which you can change, and pressing the button activates the effect. Pressing the 'Off' button
next to the effect name turns the LEDs which are included in the effect to off (black). The 'All Off' button turns every LED off.
OIn order to edit the effects to suit your desired lighting effects, first press the 'Edit Effects' button in the top right. The screen will then look like this, with a settings icon next to each effect.
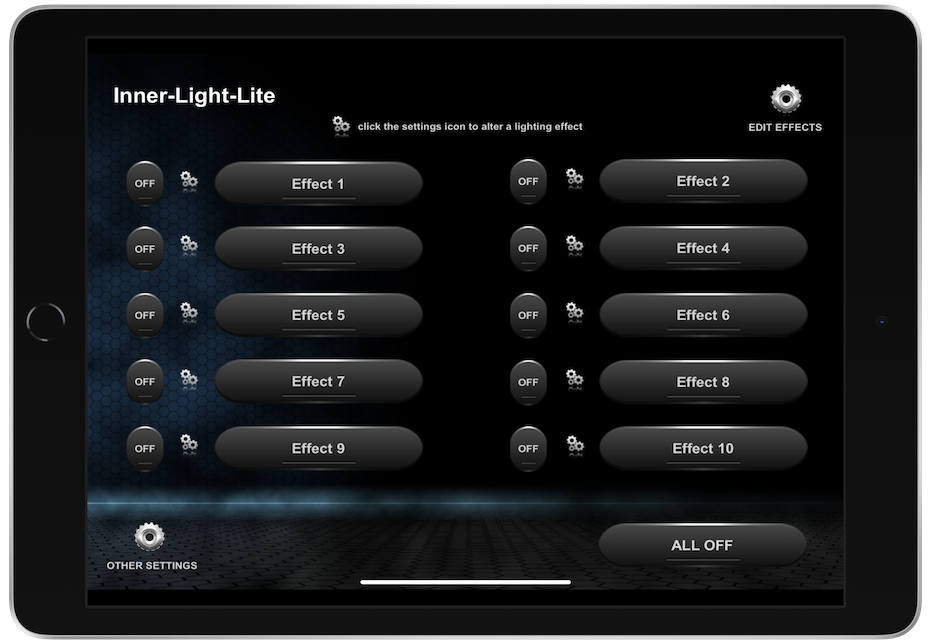
Press the effect settings icon to go to the configuration for the effect - there are 2 steps:
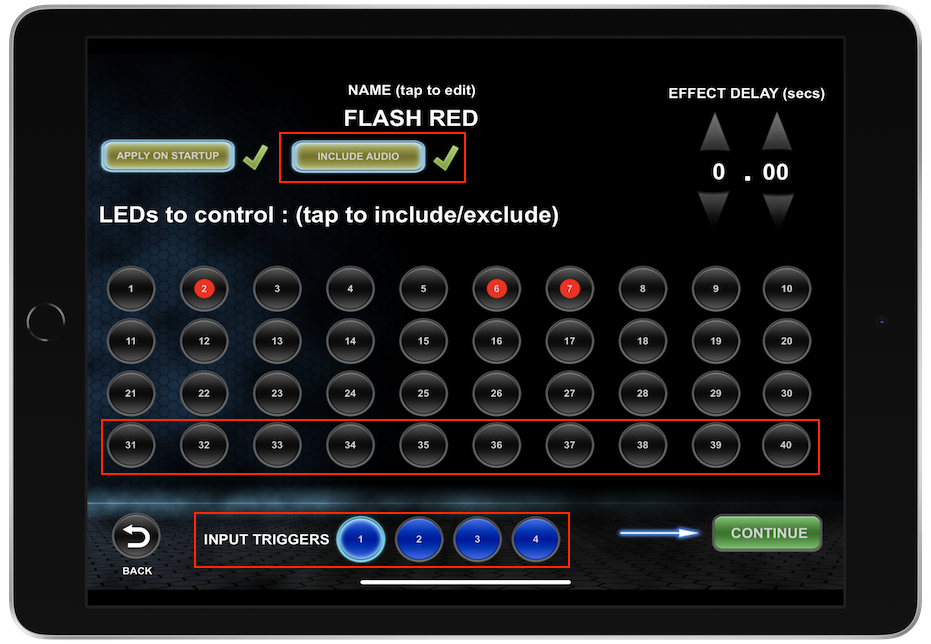
NOTE: the areas highlighted in red relate to the Lite Plus controller only
Effect Name
You can change the name of the effect by tapping the current name, this will bring up a keyboard & allow to to modify:
Apply on Startup
If highlighted (tap to change) this effect will be applied when the controller is powered on, with an optional delay if entered using the arrows in the top right.
Include Audio (Plus only)
If highlighted (tap to change) this will cause the associated sound file to play when the effect is applied. (Please refer to the audio section)
Input Triggers (Plus only)
The 4 physical button inputs which are available on the Lite Plus controller can activate one or more effects, depending on whether the associated input number is highlighted here. Each input has 2 wires, with a connector. Simply short the 2 wires to trigger the input and associated effects.
LEDs to Control
You can choose which of the LEDs will be affected by this particular effect. Tap an LED number to select / deselect from inclusion. When selecting, the actual physical LED in question (if connected) should illuminate red.
Once the above is configured, click 'Continue' to proceed.
Effect Types
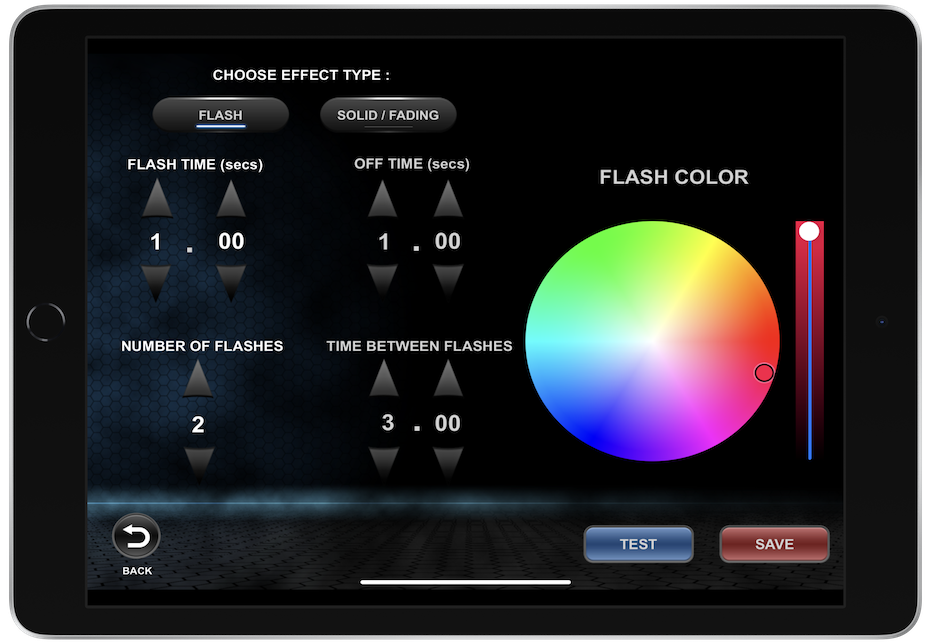
There are two possible effect types supported by the Lite controllers - Flash and Solid / Fade.

In the case of the fade option, you can choose whether the effect runs just once, or continuously.
Flash Effect
As the name suggests, this causes the selected LEDs to flash a certain , which you choose using the wheel. You can also choose the timings of the flash, and whether there are multiple flashes followed by a delay. The flashing will continue indefintely (or until another effect which uses those LEDs is activated).
TIP: Note the 'Off' state refers to the the LED was previously, not necessarily off / black. For example, you may set one LED red with a solid effect, another LED green with a different solid effect, and then create a flash effect which makes them both flash black (by reducing the right hand brightness level to 0). This gives the effect of both LEDs flashing their respective in sync with each other.
Solid / Fade Effect
As the name suggests, this causes the selected LEDs to fade to a certain , which you choose using the wheel. You can choose the time it takes the LED to go to the desired , from the it was previously. You can also add up to 5 different s, including black, with different timings, to give a range of effects, by usg the 'add ' option and scrolling up/down.
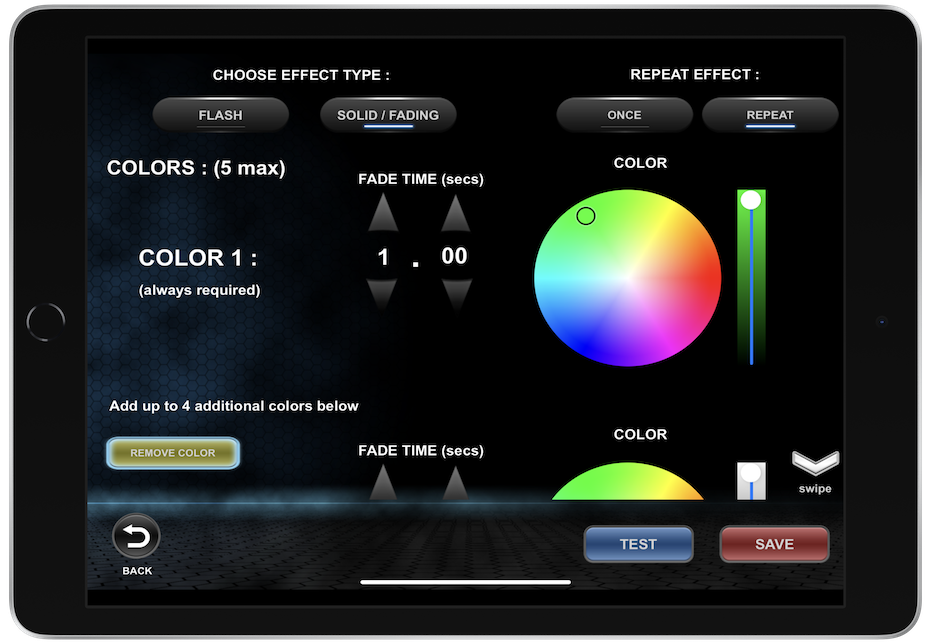
If you select the 'repeat' option in the top right, then the LEDs in question will constantly go from the first to the last, repeating indefintely (or until another effect which uses those LEDs is activated)
Testing / Saving
You can test the effect using the 'Test' button, and once you are happy, press the 'Save' button to store the changes in the controller.
Advanced - Swap RGB to GRB
It is sometimes necessary (for example when using the 5mm RGB LEDs) to tell the controller that the 'Red' and 'Green' channels are reversed for those LEDs. Certain types of LEDs (specifically the 5mm RGB LEDs from the store) have these two options reversed.
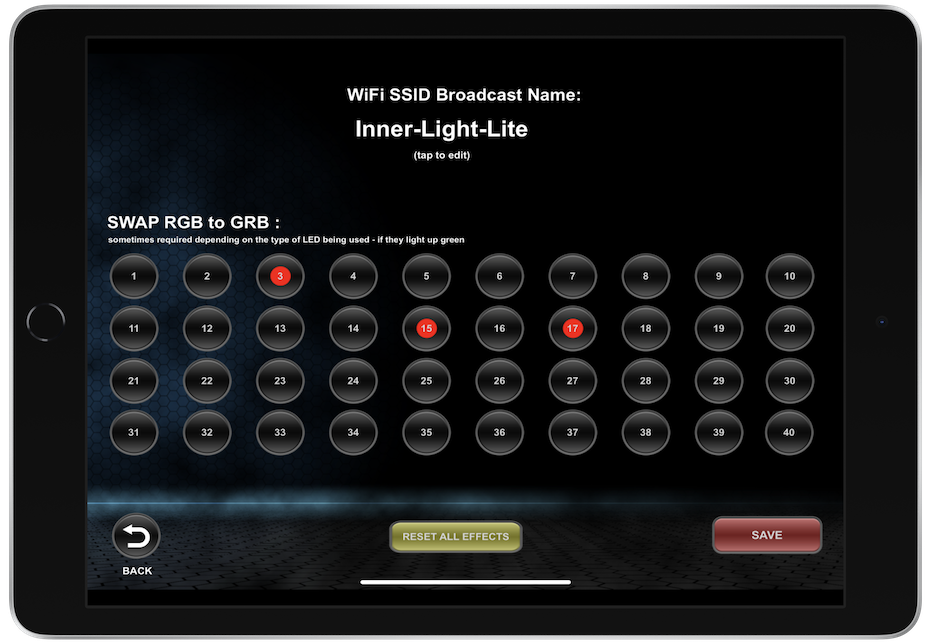
If you fail to specify these LEDs in this section, then setting one of the LEDs to red for example will make it appear green etc!
Advanced - WiFi naming
If you have multiple controllers, and/or wish the broadcast WiFi name to be something personalised, you can change the name from the 'Other Settings' button in the bottom left of the main control screen:
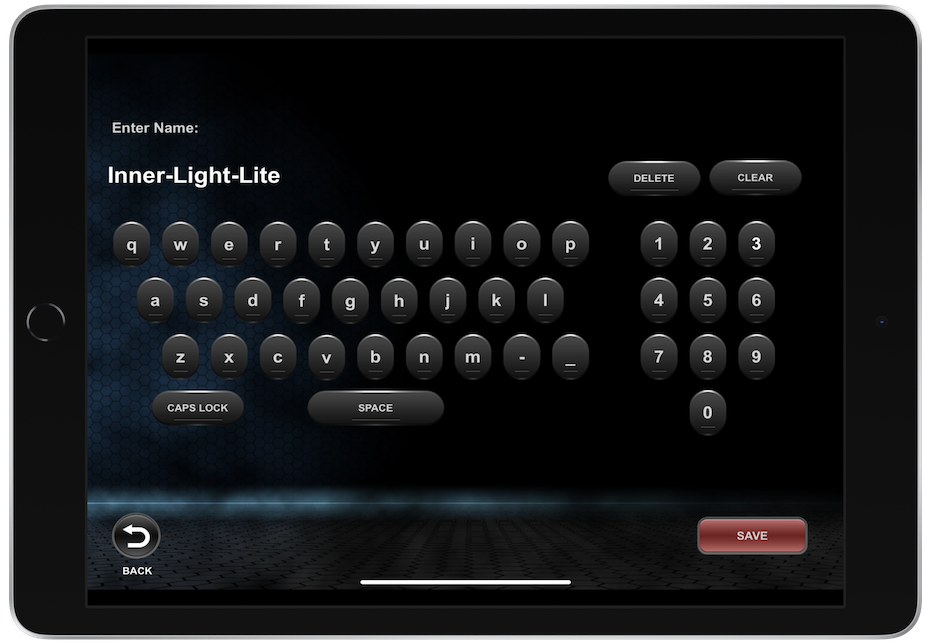
Once you press 'Save', you will need to reset power to the controller for the new WiFi network name to take effect. Once the controll resets, you should be able to see the WiFi being broadcast from your device. The WiFi password will be unchanged.
Advanced - Audio (Plus only)
If using the Lite Plus controller, it is possible to include sound using an Adafruit Audio unit (supplied in the Plus starter kit). This unit has a jack output for sound, just like the Pro controller.
The Adafruit Audio unit connection is the small 3 wire connector (red, black, yellow) - this provides both power and communication to the Audio unit from the Lite Controller. The audio unit has 10 files called Txx.WAV where xx is a number from 00 to 09. Each sound file will play when the corresponding effect is called, provided the 'Include Audio' option is selected for that lighting effect in the configuration app.
To alter the sound files, connect the Audio unit to your computer via USB (** IMPORTANT - remove the connection to the Lite Controller first!!) and then replace the files with your own WAV audio files, with exactly the same file name.
Note: the audio unit is only capable of playing one sound file at once.
Updating Firmware
If new firmware for the Lite or Lite Plus controllers becomes available, details will be added here.
Troubleshooting
Hopefully the instructions above are sufficient, however if you experience any prolems please use the contact section to get in touch & I will do my best to assist.
If the issue is related to LEDs inside a model, it is helpful to disconnect and try the controller with separate LEDs directly, this should narrow down the issue to either the controller, or the LEDs/wiring in your model